Integrating your application with railtown.ai involves the following 3 things:
- Sending your logs to railtown.ai, covered in other blog posts
- Letting railtown.ai know when you successfully complete a build and when you deploy the build to an environment, covered in this blog post
- Integrating with your ticketing system so that railtown.ai can pull your ticket data and add tickets to your ticketing system, covered in other blog posts
If you do all 3 of these things you will be able to leverage the full AI powered capabilities of railtown.ai to help you find quick resolutions to the problems plaguing your application.
The following sections show you how to set up Azure DevOps Pipelines and Releases to let railtown.ai know when your builds and deployments are successfully completed.
Difficulty 1: Raw errors are bulky and messy
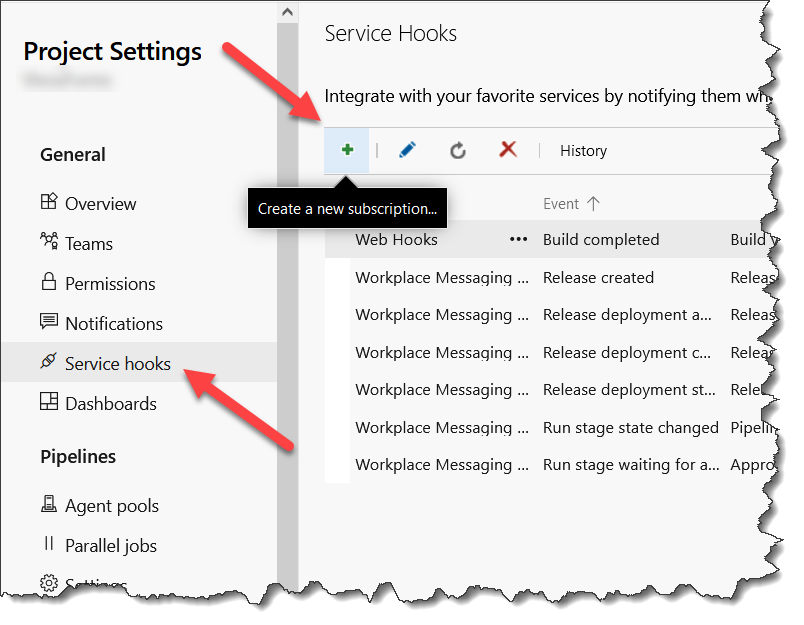
To let railtown know when a build successfully completes you need to create a new Service hook under Project Settings
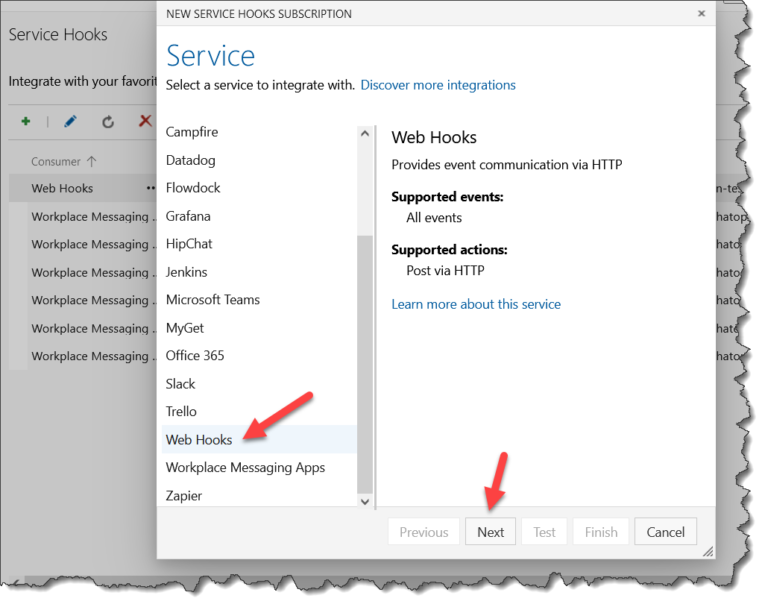
Choose the Web Hooks service
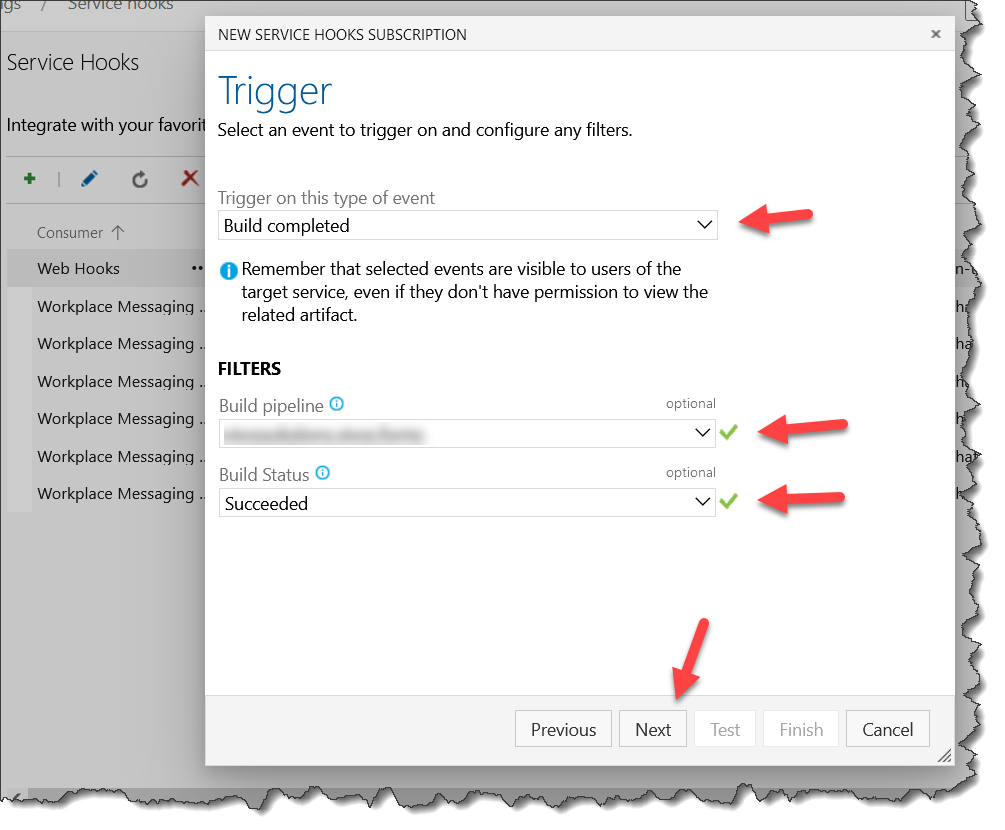
Choose the Build completed trigger, your Build pipeline and a Build Status of Succeeded
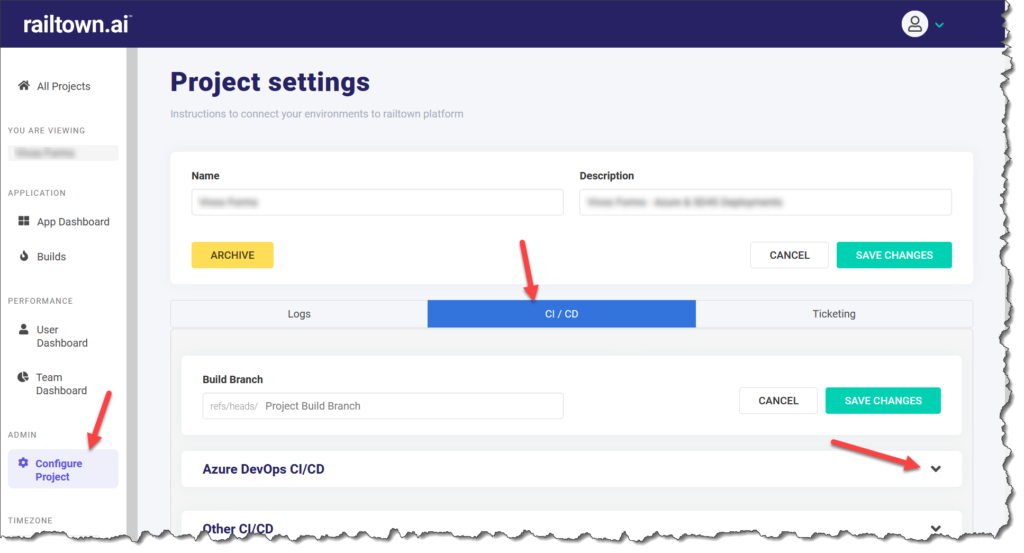
Go to your railtown.ai Project settings CI/CD section and expand the Azure DevOps CI/CD section
Copy the Build Webhook
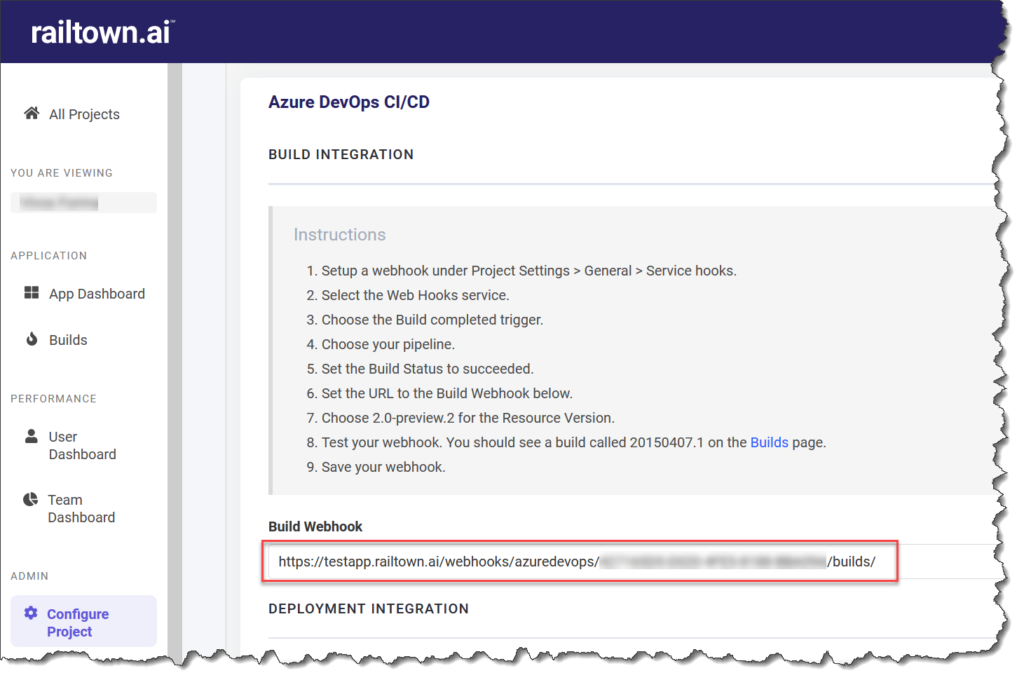
Paste the Build Webhook into the Azure DevOps service hook URL
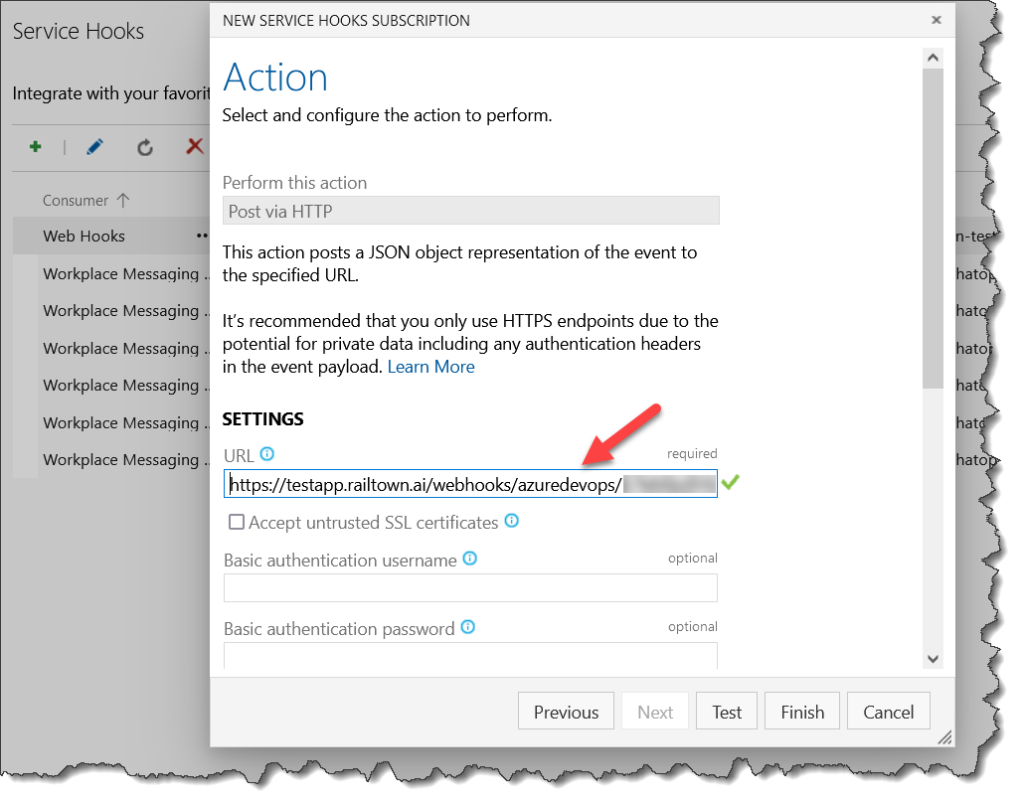
Choose 2.0-preview.2 for the Resource Version and Finish creating your service hook
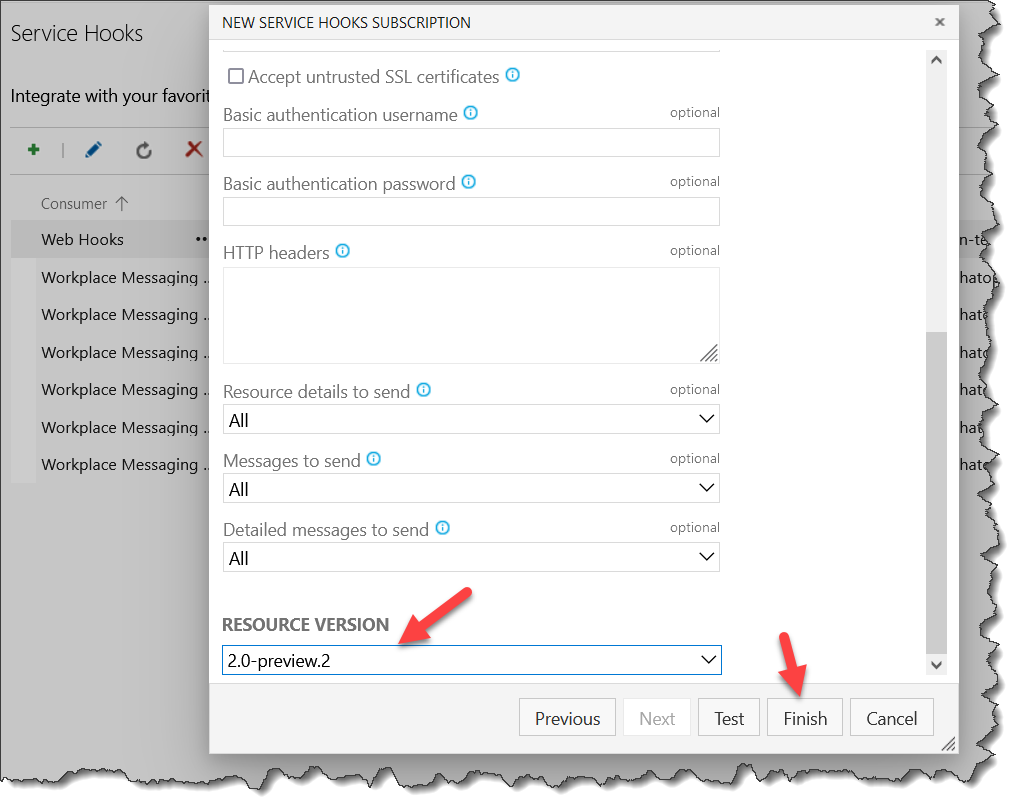
Congratulations you have successfully integrated your builds with railtown.ai
Next time you do a build railtown.ai will be informed of the successful build.
Let railtown.ai know when a build is deployed to an environment
Create a Service Connection
To let railtown know when a build is deployed successfully to an environment you first need to create a new Service connection under Project Settings
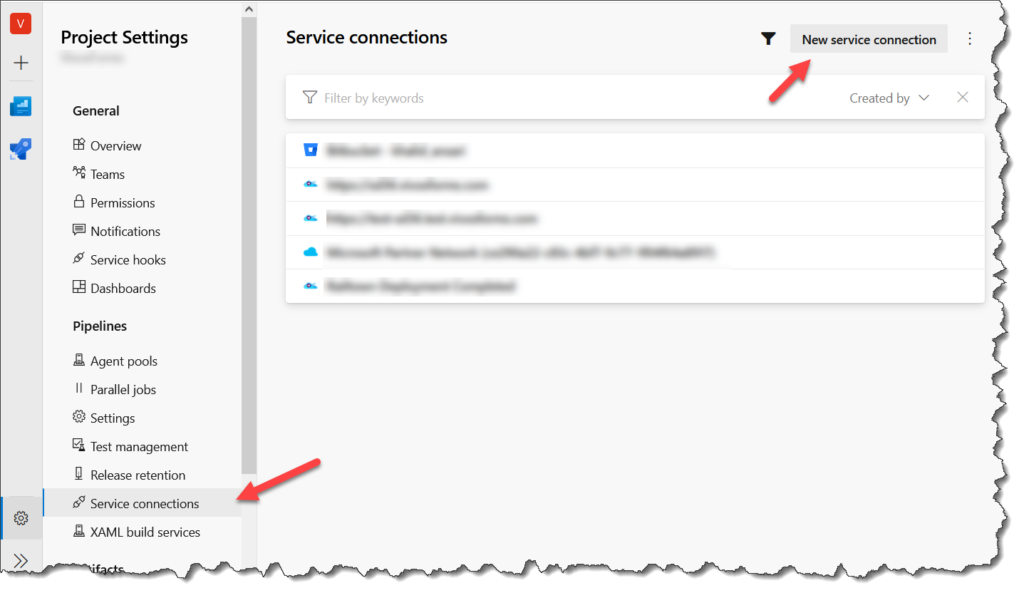
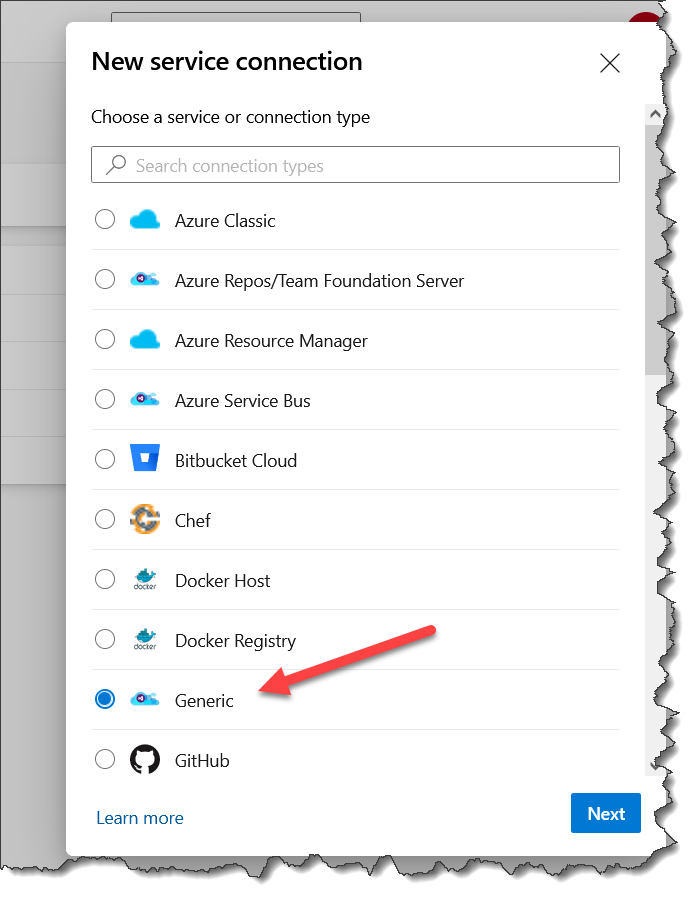
Choose the Generic service connection type
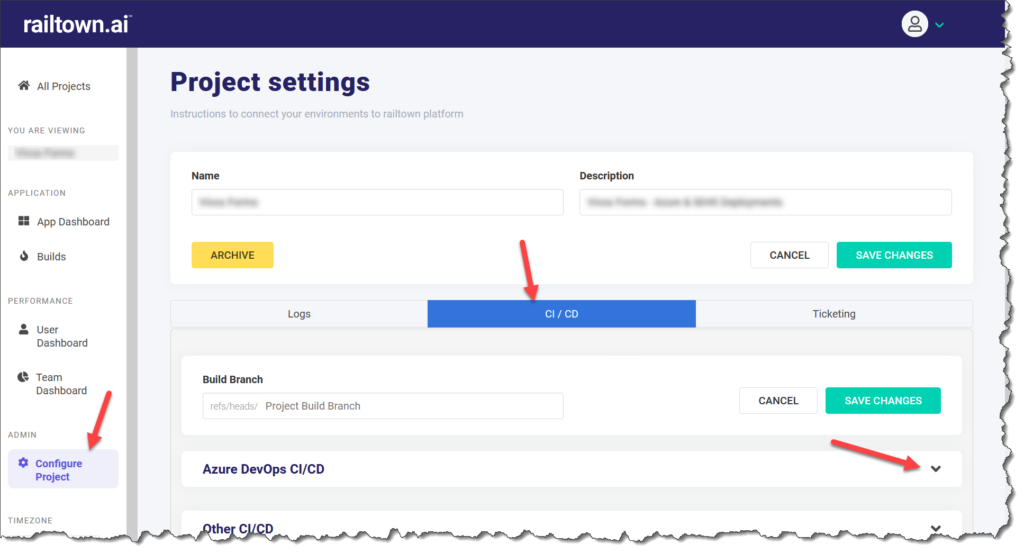
Go to your railtown.ai Project settings CI/CD section and expand Azure DevOps CI/CD section and scroll down to the Deployment Integration section
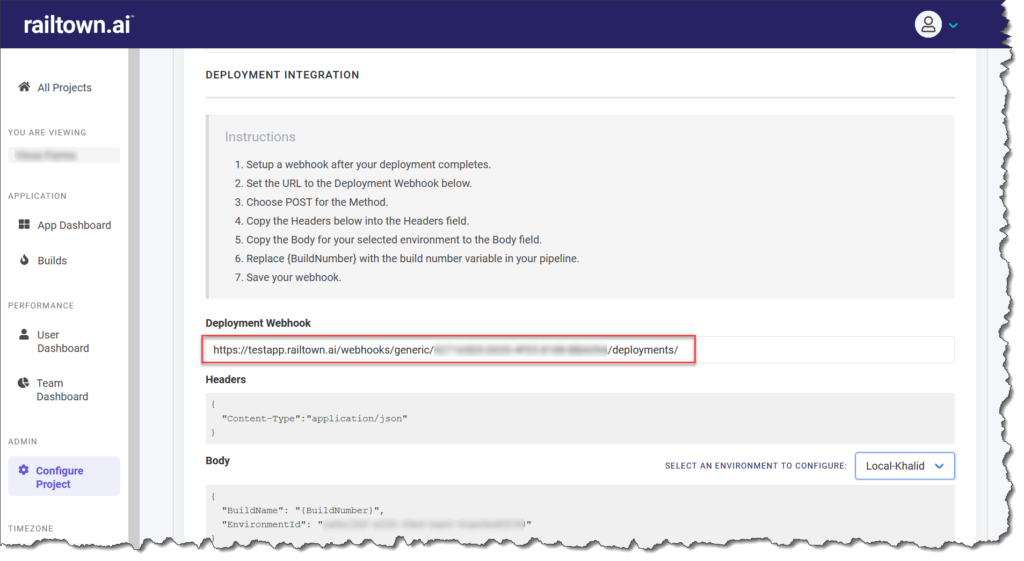
Copy the Deployment Webhook URL
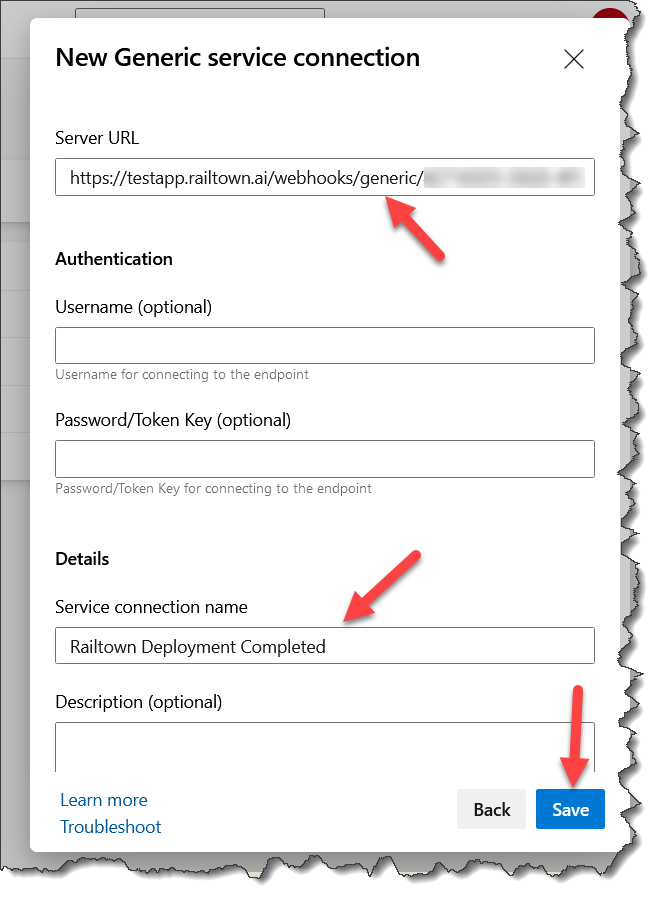
Paste the Deployment Webhook URL into the Server URL field in the New Generic service connection, enter a Service connection name and click Save
Create a Release Post-deployment Gate
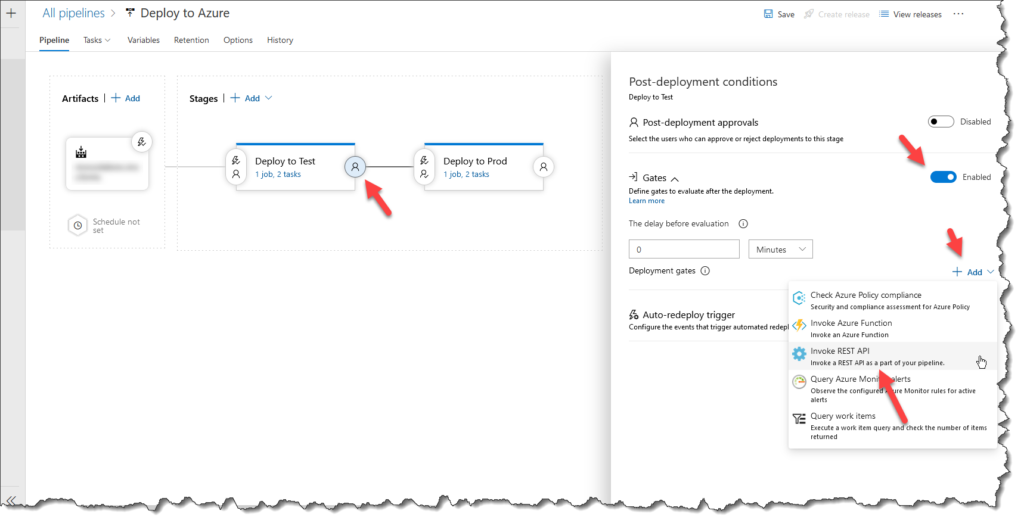
Next we are going to add a post-deployment gate to your release pipeline. Edit your release pipeline and click the icon to the right of your pipeline stage, turn on the switch for Gates, click the Add button and choose Invoke REST API
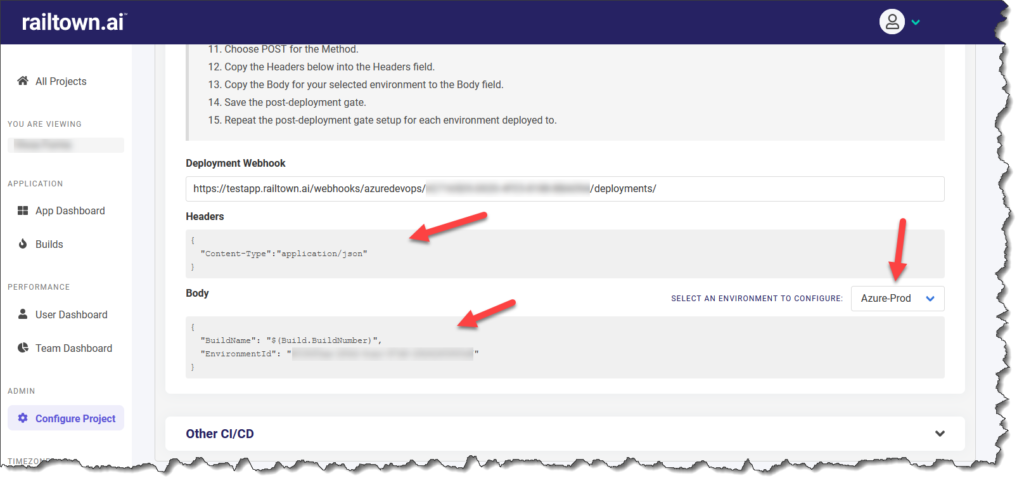
Go back to your railtown.ai project configuration as you will need to copy the Headers and Body content. Before copying the Body content ensure you have selected the correct environment for your application
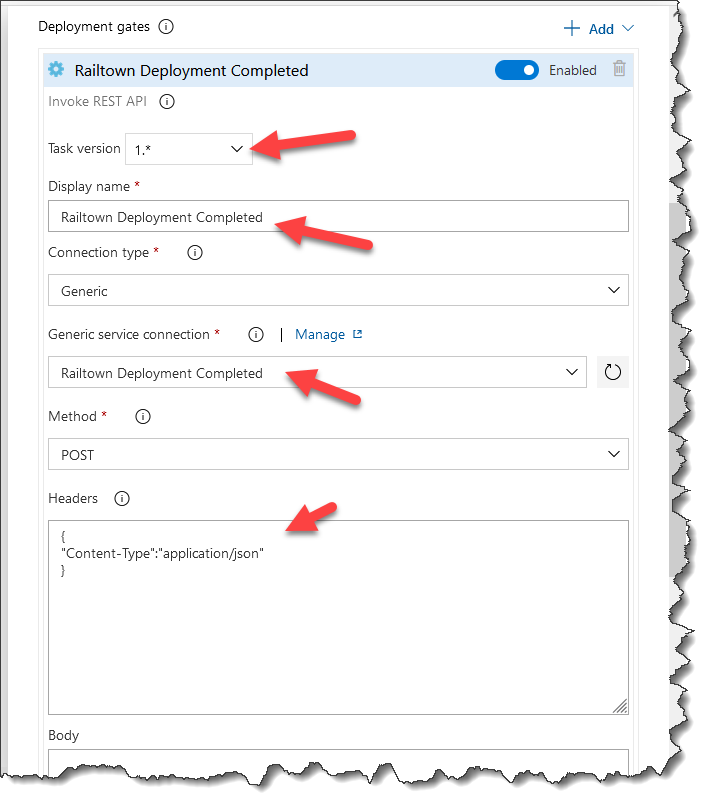
Go back to your post-deployment gate setup and choose Task version 1.*, enter a Display name, select the service connection you created earlier and paste in the Headers you copied from the railtown.ai configuration
Next copy the Body from the railtown.ai configuration ensuring that you selected the environment that matches with your pipeline deployment
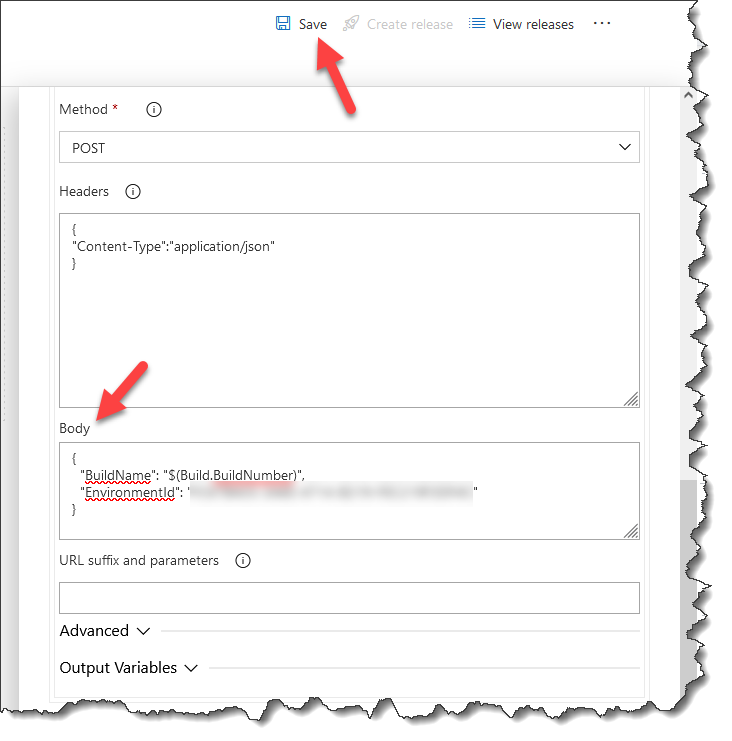
Click the Save button.
Repeat the above steps for creating the post-deployment gate above for any other environments in your pipeline.
Congratulations you have successfully integrated your deployments with railtown.ai
Next time you release a build to an environment railtown.ai will be informed of the successful deployment to that environment.
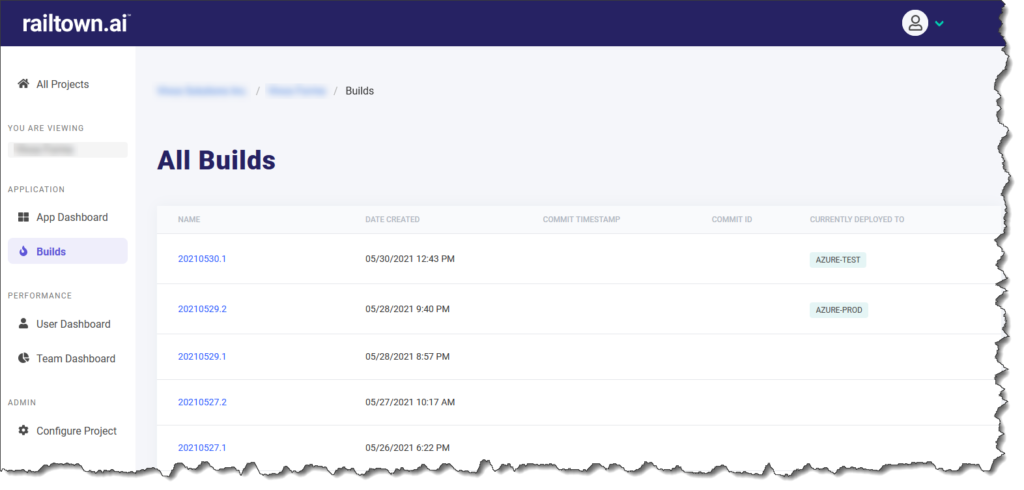
The Builds page in railtown.ai will show you which builds are deployed to which environments.
To get the full AI powered capabilities of railtown.ai working for you make sure you also integrate your ticketing system so that railtown.ai can look at the logs coming in from your environments, bucket them into similar exception buckets, match them with the build deployed to that environment and then match it with tickets that may have resulted in causing the problem.
If you don’t already have a railtown.ai account sign up and let us help you improve the quality of your software and increase your developer velocity.